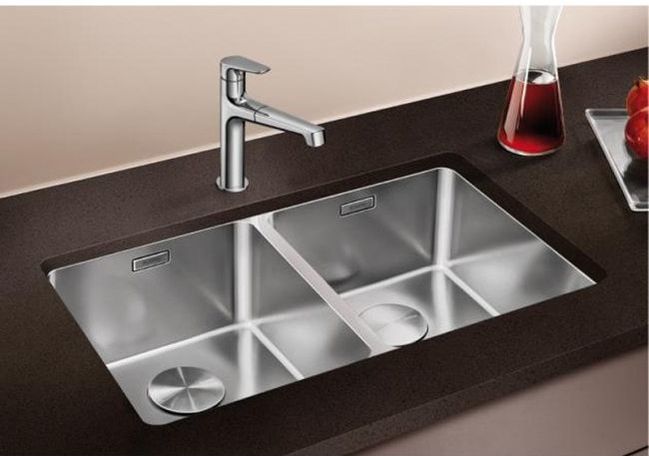
 Dispose of Gunk Pretty much everything that occurs in the kitchen — cooking, cleaning, children's specialty tasks, and that's only the tip of the iceberg — includes the sink, so it gets recolored effortlessly. Splotches appear most clearly on light porcelain or active pitch surfaces, yet even stainless steel is defenseless. The speediest method to expel marks from these surfaces: Use an eraser-type wipe like Mr. Clean Magic Eraser. (Additional resolved spots may require a spritz of a universally handy cleaner with dye, and that's just the beginning "deleting.") Then flush. Sterilize Wisely To sterilize any sink in the wake of cleaning, plug the drain and fill the bowl with a gallon of warm water. Wash in a tablespoon of dye. Dunk in a wipe; wipe down the spigot and handles. Let sit no less than five minutes. Wash and permit to air dry. Make It Easier Next Time Reserve heating pop under the sink, sprinkle it on stains before they set in, and merely wipe and wash. Reward: Baking pop battles drain scents. A stainless steel sink looking spiffy, take a couple of minutes to smooth away scratches, which harbor stains and microorganisms, with a powdered stainless steel chemical, similar to Cameo, and a regular wipe. While you're busy, help repulse grime by applying a light covering of mineral oil with a cloth. Wipe out the trap Unscrew the slip nut between the P-trap and the trap arm in the first place, at that point the bolt at the base of the waste tee. Wipe out any flotsam and jetsam from the P-trap. Review both the P-trap and the trap arm for splits or frail dividers. If it's ragged, supplant it to maintain a strategic distance from issues later on. Reinstall the P-trap and test the line with warm water. Don't over-fix the slip nuts. Hand tight in addition to a quarter turn with forceps ought to be sufficient. Expel the trap arm If the P-trap isn't stopped up, proceed onward and evacuate the trap arm and clean it. To expel the trap arm, slacken the slip nut and slide the trap arm from the drain line stub-out. You will probably require pincers to discharge the ball. Next, run a screwdriver around within the pipe stub-out and haul out any garbage that may have gathered in the opening. If despite everything you haven't discovered the stop up, go after the snake! Stage 4: How to Snake a Drain Start by releasing the setscrew at the tip of the snake and hauling out 6 to 10. Of link. At that point fix the setscrew and turn the snake down into the drain line. At first, you may feel a hindrance, yet it's imaginable that the tip of the snake is merely turning a corner. Relax the setscrew, haul out another 6 to 10. Of link and keep on feeding the snake into the line. Embed the snake String the tip of the snake into the drain stub-out. Fix the setscrew and transform the wrench clockwise to encourage it into the drainpipe. Turn the snake through the obstructed Keep on turning the snake when you experience protection. The snake tip is intended to corkscrew through obstructs and around corners. Withdraw the snake If you feel the link hit a check, keep wrenching and pushing the ring through the stop up until the point when you think the tip nibble through. These ought to be evident because the strain in the link will drop. When you are through the stop up, turn the wrench counterclockwise and haul out the link. Clean the link as you pull; it'll presumably secure with unbelievably grimy gunk. You may get an expansive attachment of material toward the finish of the snake, so keep that basin helpful. Rehash the procedure until you never again feel a blockage, at that point reassemble the trap and run a lot of warm water to flush the line. You should choose the right sink for your kitchen. After the drain is open, pour 1/2 measure of heating pop and 1/2 measure of white vinegar into the pipe. Cover the two openings and let it sit for a couple of minutes. At that point run another gallon or so of warm water behind it to flush out the blend. The blend of preparing pop and vinegar can separate any remaining fat stores and will leave your drain noticing new. Reinstall the P-trap and run water to test the pipe.
0 Comments
Leave a Reply. |
AuthorHey, I am Allison Barefield, I live in New York City.My favorite thing travels and ArchivesCategories |
 RSS Feed
